


Trust me, its a LOT of work to make things look pretty. Im so thankful that I have a photo program to help me touch up my pictures. There isnt a photograph that I dont fix (crop, change brightness, contrast, alter color) before presenting it to the world.
Im sure there would be a lot less to fix if I also knew how to properly work my camera. But that would require reading. Or sitting still.
Here's how about how I go about it. I want you to know that this isnt the BEST way, or an easy way. It just works for me.


CAMERA SETTINGS
-I take my photos next to my window, when it is bright out. Not sunshiney. Just bright. The whiter, the better- which is easy in the northeast. The sky is white (not blue) for 8 months a year. Perfect!
-I have my camera set to magnify. Its sort of like macro but I can't zoom, I have to physically get right up there, like a magnifying glass.
-I set the white balance to the type of light I have in the room, sunlight, lightbulb, cloudy. I watch how the screen changes with each selection, to see which mimics the actual color of the object the best.
-You may set the focus too, multi allows for all over, center for just the middle of the shot is clear, spot is for one little area. Decide how you want your photo to look. I use multi.
-I set the EV + or - for lighter or darker shots. I dont even know what EV stands for. Im not a professional, remember? It just works! If I set the EV to - or darker, then I can boost the brightness later without washing the detail out of the image. Play around with this.


PHOTO EDITING
Once I've got a picture taken, it still needs to be treated.
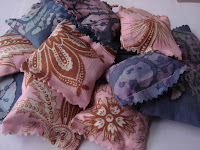
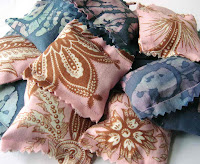
-Crop the photo. When I have a photo for etsy, I crop one square for the first thumb, and crop the others for the best looking product shot. I crop everything.
-Adjust the color. I find the area I want white and change it. The blue background on the left butterfly shot is what I need to base my other colors off of. I want that white, so I need to change it to a gray first (by adding some red and playing around). Or you canuse 'auto-adjust color'.
-Adjust the brightness and contrast. Sometimes my object looks pathetic, and tweaking this a little can help.
-Sometimes I use the saturation button. If my item looks hypercolor, I turn it down a bit.
Remember though, a lot of photos look fabulous because they are taken in great lighting or because they are not altered. Pick and choose.
Theres a million zillion ways to alter, fix, enhance photos with programs. These are just the very basics. Play around, find a good system for your needs.
Theres a million zillion ways to alter, fix, enhance photos with programs. These are just the very basics. Play around, find a good system for your needs.
One split second captures an image, but you can take the next step of how it will be seen.
8 comments:
You've described it beautifully! It's amazing how much of a difference a little tweaking can make. :D
thanks for looking to help with my font problem!
very helpful post, I am bookmarking this one for sure. Thanks.
Wow! This is the most useful post I've read all week. Thanks SO much!
Nice tips. I will put them to good use. I find myself holding back on listing because of photography.
Thank you so much. Now I can take better pictures of my purses.
I know how you feel xD I touch my pictures up too =P
Great tips! If you have Photoshop you can use the levels to adjust brightness very easily. When you open the histogram (that's what the little graph is called) you want to bring right side in towards the left side just to the start of the hump. Play around with all 3 but usually the white will fix a lot of pictures easily. Another way of doing it is to click on the pen that represents white and click on your picture where it should be white. This will sometimes go too far though so I have a tendancy to move the white slider until I'm happy.
winnie
Post a Comment